Tips For DIY Home Renovation

Beginner’s guide to managing a remodel

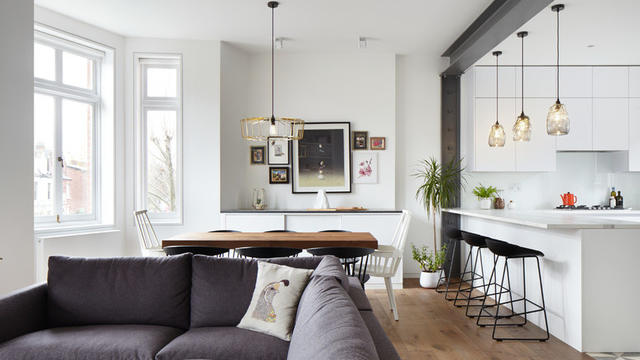
Browsing photos and ideas can be a fun part of creating your dream room. But making your designs a reality also takes smart planning and organization. Project management is an essential part of home remodeling, and there’s nothing like the feeling of implementing a plan to create something new and beautiful. These tips can help you achieve your desired results.

Become a list writer

Making lists is key when it comes to project management. It’s the only way to properly organize your thoughts and prevent any details from being forgotten. The most important list is your scope of work, or specifications, document. This is basically a detailed list of everything to be done, from start to finish. If you’re dealing with one main builder who’s organizing all the work, then you’ll need to make sure he or she gets a copy, so the goals are clear and all the information is provided.

Make sure you’re all on the same page

If you’re coordinating separate subcontractors (cabinetmaker, plumber, electrician), then it would be worth indicating who’s responsible for each task. Give a complete copy of the specifications to all of them, so they’re all aware of what everyone is doing. Discuss the specifications with your subcontractors since they may be able to provide help and advice. A schedule is also useful, so you can keep track of progress and everyone knows who’s going to be on-site on which day.

Break into subsections

In addition to your main specifications, it’s a good idea to have sublists for each separate element of your design. For example, your main specifications may say “install 6 x recessed LED downlights in ceiling,” but your lighting specifications will detail where they are to be positioned, the type of bulb, the hardware finish and so on. The more information you provide, the more accurate your quote should be and the less likely it will be for mistakes or misunderstandings to occur. It will also minimize any unexpected costs.

Stand by for decisions

Your builder will present many questions and decisions to you along the way. Which tiles do you want on the walls? Where do you want these wall lights? What color do you want on the baseboards? Your best bet will be to try to pre-empt as many of these decisions as possible and have the answers ready or, even better, provide the information in advance. Making these decisions under pressure can lead to impulse moves you may regret later. However, taking too long could hold up the project, costing you time, money and the patience of your builder. No one wants an unhappy builder.

The Ultimate Step-By-Step Guide to Renovating a House – where to start

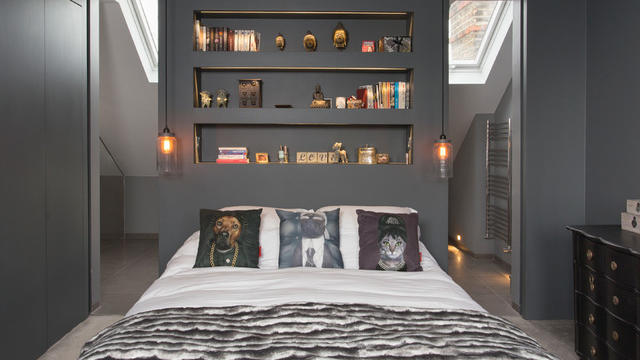
You’re undoubtedly about to take on one of the most transformational projects in your lifetime. Renovation planning is up there with planning a wedding, or starting a family. It doesn’t come without its stresses but you’ll never regret it and you’ll build memories (and a home) for a lifetime.

Well, not the wedding part (we’re one of those couples who has been engaged for 5+ years!) No, we bought a disgusting, dated 1930s fixer upper and renovated it to be our perfect, Modern Country inspired home.

Renovating a house step by step

Back when we first started out in the world of interiors and home renovations, one thing we wish we found was a step-by-step renovation guide to explain how a renovation typically evolved. There was just no support for renovators out there at the time, which is why we’ve created everything you need to smoothly renovate a house right here on this website.

Having a timeline, step by step to renovating a house is something the renovators we work with get such huge clarity from. It helps them to understand what’s required, how long it might take, and it’s useful for costing up projects.

You might be at different stages to others so we’ve split this timeline of a renovation up 4 phases:

Phase 1: Considering a renovation – you might be looking for a property to renovate currently, assessing options

Phase 2: Purchasing a renovation – you might have an accepted offer on a property, starting to plan your home renovation

Phase 3: Planning a renovation – you might already have the keys to your home renovation, either living there or not, and you’re planning which order to do work in

Phase 4: Renovating – maybe you’ve got contractors and builders already working on areas of your home renovation and you’re keen to clarify the order of events

No matter what stage you’re at, the first thing we must tell you is – no home renovation is the same. Houses and projects are all different, so with this, timelines will vary. But there is an ‘ideal’ or ‘typical’ step by step to planning a renovation which we’ll share below.

What You Need to Know About Bathroom Renovations?

Remodelling your bathroom can be a lot of fun if you know what you’re doing. If you’re going all out with a complete renovation, you’ll need some expert help. Even if you have some DIY skills, bathroom renovations are not to be taken lightly. They require a great deal of planning. Everything from budget to plumbing needs to be considered. Before you pick out that new bathtub or shiny floor tiles, you should make a checklist of everything that you need.

Here are some ideas on how to prepare:

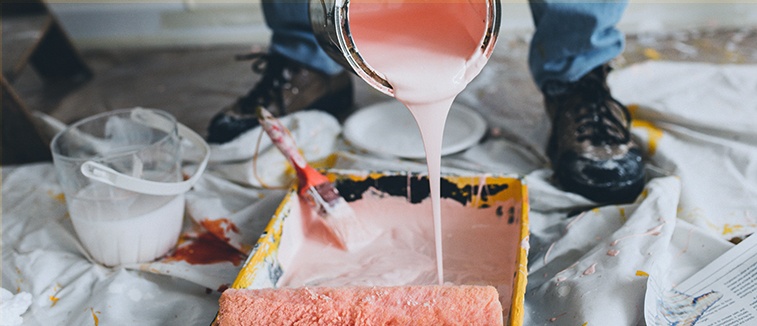
Set a budget. It shouldn’t be too specific, however, since there may be expenses that you haven’t thought about it. Have a general idea of what you will be able to afford. Some of the money should go toward labour and some of it should go toward materials, fixtures, and extras. If you are on a tight budget, consider refinishing existing items instead of outright replacing them.

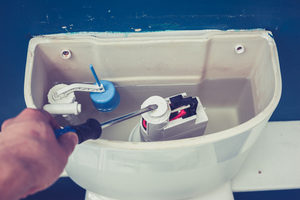
Prepare for hidden problems – especially if you are planning a major renovation. Depending on factors such as the age of the bathroom and how well it was built, there might be some structural deficiencies, vented plumbing problems, rusting tub surrounds, old corroded plumbing, etc. Look for signs of water damage. Moisture related problems can be taken care of with a proper ventilation system.

Consider size and take measurements. The bathroom is typically one of – if not the – smallest rooms in a house. You must take measurements over and over again to ensure accuracy. It’s also important to know the exact specifications and location of existing wiring and plumbing pipes. If budget is a concern, try to keep the load-bearing walls where they are so that the plumbing and electrical lines won’t need to be rerouted.

When you have the layout prepared, you can FINALLY think about the design. Look at pictures of bathrooms you like and ask your interior designer for some recommendations. Ideally, use the same finish throughout the bathroom for consistency. There are many finishes for the faucet and hardware, such as shower heads and drawer pulls: brushed nickel, stainless steel, copper, chrome, matte black, aged bronze, oil-brushed bronze, white, etc.

Look over the layout carefully and select a bathtub that will fit to the exact measurements. Factors to consider include size, material and colour, design, and how much room is available. Since it’ll be around for years and years to come, be sure to go with a tub that you really like. It should be really comfortable. If you want a heavy tub, make sure the floor underneath is strong enough to support it. The water heater should be able to generate enough hot water to fill it. Also, keep in mind that not all bathtubs allow for shower installation.

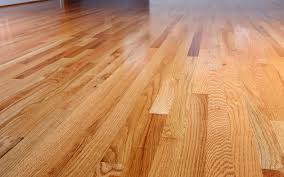
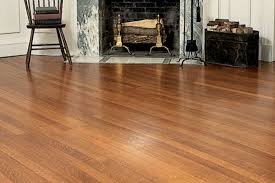
The floor should have a non-skid surface and be stain-resistant and moisture-proof. It should be durable enough to withstand a lot of traffic. Ceramic tile is the preferred choice of many designers. Vinyl is a great choice if you have kids, as it is highly resistant to moisture and durable enough to stand heavy use. If you want to go with vinyl, select textured varieties that provide good traction.

What Should I Include on My Bathroom Renovation Checklist?

A remodelled bathroom can make a huge difference in terms of the comfort and functionality of a home. If you are ready to upgrade your bathroom, understand that this is a very involved project, but the end results are certainly very worthwhile. You can reduce the hassle and complications by following a bathroom renovation checklist.

Budget

Before you start to make any plans or purchases, you must first determine what you are willing to spend total for your bathroom renovation. As you begin to choose specific design elements, this amount can be divided to cover the different features. Leave cushion amount left over to cover unexpected expenses that can and likely will arise.

Design

Next, it is time for the fun part. You can start to envision and create your design for your finished bathroom. Take the measurements of the room and determine what your room can accommodate in terms of a tub, shower, cabinetry, and other design elements that are important to you. These plans may change, of course, as you factor in your budget.

Materials

Next, it is time to choose your materials. Be sure to choose materials that will not only fit your design and budget, but will also be able to withstand moisture with minimal maintenance. Don’t forget to account for fundamental building materials, such as drywall, caulk, and other necessities.

Fixtures

Even the smallest details can have a major impact on the overall look of your bathroom. You can create a cohesive look by coordinating all of your fixtures. Tie the room together by choosing matching lighting fixtures, towel racks, cabinet hardware, and faucets.

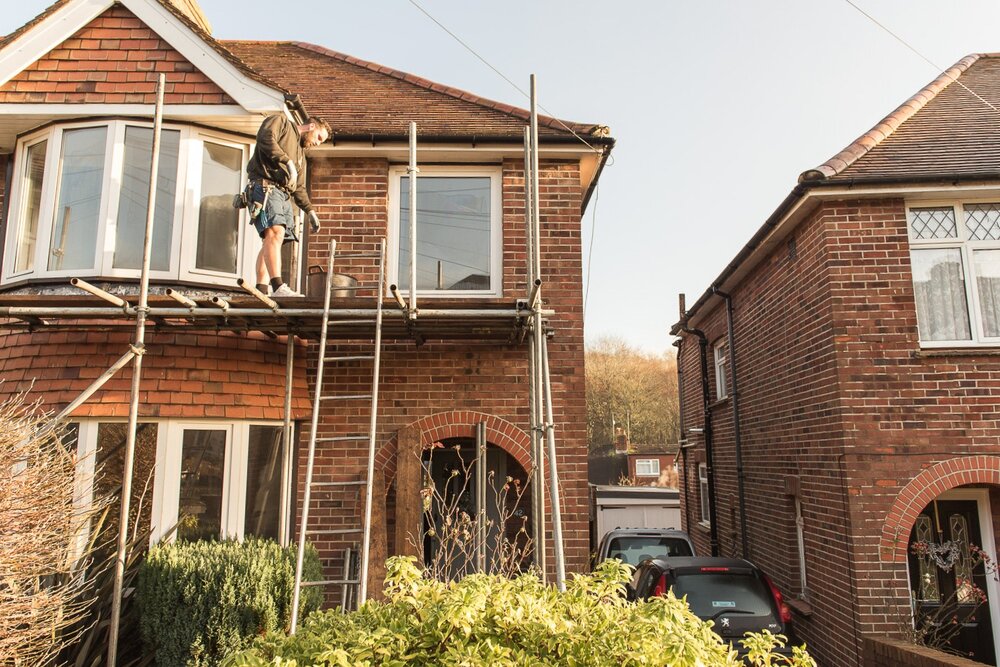
What Questions Should I Ask When Looking for a Home Renovation Contractor?

Hiring a home renovation contractor is not a decision that can be taken lightly. This individual is responsible for transforming your home and allocating your renovation budget wisely.

What Is Your Experience?

Find out more than just how many years the company has been in business. Ask about any specialties and areas of focus the organization has and ask to see a portfolio of finished work. If you are considering a whole-house renovation, a contractor that has primarily only completed minor repairs is not likely the best choice, even if they have been working for decades

What Guarantees Do You Provide?

In addition to asking your contractor if they are licensed and insured, find out if they offer any additional protections, such as warranties or guarantees. Some contractors will warranty their work for a set amount of time after the project is completed and/or provide extended warranties at an additional cost.

Who Will Be On-Site Completing the Work?

An experienced home renovation contractor that has an impressive portfolio does you little good if inexperienced crews arrive to complete your project. Ask your contractor to tell you the specific people who will be completing each element of your project. If they do subcontract elements of the project, you need to know about these work crews.

Can You Provide a Proposed Timeline?

Ask potential contractors to make you a rough outline of how and when they would complete your project. Some contractors may not be willing to provide this much information before being awarded the job, but many will be willing to earn your confidence by delivering a rough estimate of the schedule that would be followed, allowing you to know what you can expect.

Keeping The Toilet Installation Close To The Wall

Common Reasons Your Toilet Won’t Flush Properly

Everyone knows that when their toilet won’t flush, they have a problem. That’s not tough to figure out. Likewise with a completely clogged toilet. It’s obvious. Unfortunately, there are problems that are less obvious. Sometimes, for instance, your toilet just doesn’t work very well. Maybe it still flushes, but the flush is weak or too brief. Maybe you have to flush it multiple times to get it to work completely.

Whatever the problem, it’s not in your head. If your toilet doesn’t seem like it’s working properly, then it probably isn’t. Don’t wait for it to get any worse; act now.

How it creates a weak flush

When you flush your toilet, you’re actually letting water from the tank into the bowl. Releasing a lot of water into the bowl quickly generates the suction required to flush the toilet. When the tank doesn’t contain enough water, it doesn’t release as much water as it should when flushed. You’ll notice a weaker flush, or water may enter your toilet bowl without starting a flush at all.

How you can fix it

Most toilet manufacturers leave a mark inside the toilet tank to indicate how much water it should store. Find this mark inside the tank and make sure the water level rises to it after every flush. If you can’t find a manufacturer’s mark, make sure water rises to about inch beneath the tank’s overflow tube. If the water in your tank doesn’t rise to the mark, you have to adjust it.

How it creates a weak flush

The flapper is the rubber cup-shaped fixture located at the bottom of the toilet tank. It covers up a drain leading from the tank to the bowl. The lift chain attaches to the top of the flapper at one end and a long metal arm at the other. This metal arm attaches to the handle of the toilet. When you pull the handle, the metal arm rises, bringing the chain with it. The chain, in turn, lifts the flapper.

Why Does My Toilet Clog So Easily?

Toilet clogs are messy and embarrassing, but repeated toilet clogs are just plain frustrating. There are lots of different reasons why toilets can get clogged, and it’s one of the most common questions we get.

There’s Something Stuck in There

We’ve pulled a lot of strange things out of toilets over the years, most often toys. For some reason kids like to start their science careers by experimenting with the household plumbing. If water alone flushes just fine, but anything solid gets stuck, it’s likely that the issue is a foreign object.

You’re Using the Wrong Paper…Or Too Much

Toilet tissue is supposed to dissolve easily when it touches water, but not all brands dissolve properly. We’ve seen pricey “luxury” and cheap toilet paper brands alike refuse to fall apart properly. Some paper we’ve seen is almost as strong as newsprint…ouch!

Your Diet Needs More Fiber

While we’re plumbers, not doctors, it’s clear that some people with heavily meat-based diets can produce poo that is very solid and more likely to get stuck. Some medications can produce this effect as well. If the toilet doesn’t clog all the time, just when some people use it, this may be the cause.

There’s Not Enough Water in Your Tank

If there’s a problem with the toilet’s incoming water supply line, the tank may not be filling up fully. The result is that you don’t get the right amount of water coming into the bowl when you flush.

Reasons to Put a Urinal in Your Home

Imagine the testosterone-soaked joy of having a professional quality urinal in your home. Envision screaming “Valhalla!” while you pee standing up—not because you want to, but because you must.

Unfortunately, the primary obstacle to this essential right of manhood is usually the being least likely to use it—a wife or girlfriend. If any lady has a say in your home fixtures, she’s not likely to sign off on something her salty leavings will never grace

A urinal will end the eternal “Seat Up Wars.”

For many women, a man’s unwillingness to put a toilet seat down after relieving himself is a greater tragedy than the sinking of the Lusitania. But with the addition of a urinal, the toilets in your home will suddenly become seated-only environments.

A urinal will preserve the bathroom floor

Yes, we’re all well aware that guys can occasionally be terrible shots. (We’re talking pee, not guns, in case that wasn’t clear.) Whether we’re groggy from sleep or just not paying attention, sometimes we miss, and our pee ends up on the floor, on the toilet seat, and anywhere else that happens to be within range.

A urinal means that the toilet is now essentially hers

It’s not like you’ll stop using the toilet entirely. But now you’ll only be using it for pooping. For all intents and purposes, the toilet is hers. She can turn the sit-down commode into a personal craft project, if she wants. Encourage her to paint it, or add little curtains around it, or color coordinate it any damn way she likes.

How to Replace a Toilet Handle

Is your toilet flush handle broken, rusted, pocked, or just plain and old-fashioned looking? Maybe it’s always loose, no matter how many times you tighten that nut on the inside of the tank?

Open the Tank

Remove the tank lid and set it on a spread-out towel in an out-of-the-way spot (be careful — porcelain is brittle). Look for a model name or number printed inside the tank (as well as the brand name on the outside), and write that information down. It may come in handy when you buy a replacement handle.

Unhook the Lift Chain

You’ll see that the handle is attached to a long arm inside the tank, and that the arm is linked to a chain that lifts the flush valve. Note which hole the chain is hooked to (there are usually three or more holes on the arm) and then unhook the clasp that holds the chain to the arm.

Remove the Old Handle

Use a crescent wrench to remove the nut inside the tank that holds the handle in place. Be careful: For the vast majority of toilets, the nut has left-handed threads, which means they turn in the reverse direction of a normal nut. If you were to face the nut directly, you’d turn it clockwise to loosen it.

Purchase a Replacement

The replacement part you need is called a “toilet trip lever” and it includes the handle and swing arm. They retail for under $20, but models for high-end toilets may cost $50 to $100. Though some trip levers are labeled as universal replacements, there really is no such thing. There are differences between the length and angles of the arms, the placement on the tank (left or right, front or side), and the style and finish of the handle.

The Pros and Cons of Wall-Mounted Toilets

It’s the stuff of a bathroom designer’s dream: A sleek, space-saving toilet, absent that unsightly tank, which can be installed at precisely the right height for you. Plus, the nature of the design—a wall-mounted toilet doesn’t contact the floor—makes it a breeze to keep the area around it clean.

These elegant commodes hide the plumbing and working parts. The tank, made of lightweight plastic and styrofoam, lives behind the wall, cradled in a cast-iron or steel carrier that gets installed between two studs to provide support. The bowl floats above the floor, anchored through the drywall to the carrier.

If it all sounds a little exotic, that’s because these fixtures are far from standard. It’s easy to understand why: Installing a wall-hung toilet requires invasive and intensive reconstruction, and once it’s in place there’s no removing the lid of the tank to fiddle with a finicky flapper—the mechanicals are buried in the wall. It’s possible in some scenarios to install an access panel for repairs, but that’s a very custom solution.

Built to Code

With their compact size, wall-mounted toilets offer more flexibility when designing or updating a bathroom. “These toilets can meet building-code clearances where floor mounted toilets might not,” says

A Costly Alternative

Wall-mounted toilets come at a premium over standard toilets. Expect to pay several hundred dollars more for this type of fixture, not counting the cost of professional installation—this is not a do-it-yourself project, notes. “Already you’re paying more for this type of toilet, and depending on your circumstances, you might spend several hundred more to move the supply and waste lines or to reconfigure the studs,” he says. “It could easily be three times more expensive to switch from an existing floor to a wall-mounted toilet.”

A Facilities Management Approach To Commercial Roofing Repair And Preventive Maintenance

What do I need to know about commercial roofing?

What is Commercial Roofing?

Commercial roofing systems and residential roofs primarily have the same function of protecting property. However, they are quite different when it comes to the materials used to build and install them. Commercial roofing systems are typically made up of single-ply (TPO, PVC, EPDM), concrete, modified bitumen, built-up roofing system, tar and gravel, and more. Depending on the weather conditions, residential roofs are typically made of asphalt shingles or concrete tiles.

Since more options are available for commercial roof systems as compared to residential roofs, you need to research well and choose a reliable contractor who offers extensive commercial roofing services so you can get assured results.

How long should a commercial roof last?

As with most things in life, the short answer to this question is, “it depends.” It’s true that no two commercial roofs are exactly alike, even if they’re made from similar materials. This is because no two commercial buildings or businesses are identical, and the daily activities that take place in your unique business can affect your roof and its lifespan.

For example, if you run a busy restaurant, you likely discharge oil and fat residues from cooking through your ventilation system, which is often located on your building’s roof. If your roof is not made with a thermoplastic membrane material like TPO or PVC that is highly resistant to these substances, you could be damaging your roof – and shortening its lifespan – without even realizing it.

Different roofing materials have different average lifespans, usually between about 10 and 50 years. Typically, single-ply membrane systems (TPO and PVC mentioned above, as well as EPDM), which are some of the most popular for flat roof installations today, are made to last from between 15-30 years.

Additional factors affect your roof’s health and lifespan, too. These include the climate and weather conditions common to your location and whether your roof was installed correctly to begin with. Want to be sure that your roof has the longest possible life? Seasonal inspections and maintenance will be necessary.

Installing a Commercial Roof

Installing a commercial roofing system is very different than a residential roofing installation. Most notably is the amount of time it takes to install the roof. Most residential roofing jobs can be completed in a day or two, while it can take a month or more to install a commercial roof. Since commercial buildings are usually larger than homes, this sheer size of the roof plays into this additional installation time. Not only that, but commercial roofing systems are often more difficult to install because they involve complex installation procedures. A lot of this time is spent waiting for the materials to cure, settled, dry, etc.

Repair and Maintenance of Commercial Roofing Systems

When it comes to fixing common roofing problems, commercial repairs are much different than residential repairs. Typically, all it takes is a patch to repair a residential roof leak. But with a commercial roof, a leak could mean the entire roof needs to be repaired, such as adding a coating. Sometimes, a patch or new flashings will fix the problem, but there are often times the leak indicates a bigger problem that may require the roof to be replaced.

Always keep in mind that commercial roofing repairs are different than residential roofing repairs. With a commercial roof, you will typically have different problems than you would with a residential roof. And when you do have similar problems, the repair is often much different.

Bottom line: throw away all you have learned about residential roofing systems when you are researching commercial roofing systems and solutions. Most of the things you have learned about residential roofing are different than commercial roofing. The maintenance, service, and repairs of commercial roofs are different than residential roofs. The available systems and installation process is much different in commercial roofs.

You Need the Right Type of Roof

Since commercial roofs are much bigger than residential roofs, there isn’t much room for mistakes or errors. To put it simply – if you choose the wrong material, or a cheaper solution for your roof, you are going to wind up paying for it down the road. Before making a decision, be sure to know all the options and explore the pros and cons for each one. When thinking long term, it is best to choose reliability and durability over price in any equation.

Always Hire a Professional

Again, it will pay to spend more and get an opinion from a professional. Even if the issue is just a small leak, or something that you think is a smaller repair, it is never a good idea to allow someone with no experience to attempt and fix the roof. Small issues will quickly become bigger ones if they aren’t fixed properly the first time, or if the real cause of the problem isn’t addressed. If this happens, it won’t only cost you more, but also your business. Prior to hiring anyone, ensure they have the license, insurance and experience needed to handle the job.

Manufacturer’s Warranty

Most commercial roofing is backed by either full or pro-rated warranties against manufacturing defects and, occasionally, installation errors. Make certain you know what is covered and for how long.

Make Sure to Maintain Your Roof

In the majority of situations, the costliest issue you are going to encounter is not maintaining your roof. If you don’t invest in regular inspections, then you are going to miss signs of damage and the need for repairs. If you want to make sure this is done right, you have to hire a professional roofing contractor who knows how to check the condition of every component of your roof.

Interior And Exterior Residential Painting Tips

What’s it like to be a Painter?

Painters apply paint, varnish and special coatings to the surfaces of buildings, residential homes, schools and other structures.

Tasks and duties

Reading blueprints and instructions to determine the requirements for the job, including the quantity of materials needed and the style preference of the owners.

Preparing walls and surfaces for painting by washing them down, scraping, filling holes and cracks, and removing old paint.

Applying decorative finishes to paint jobs such as stenciling, lettering and glazing.

Reviewing each job to ensure nothing has been missed before handing it over to the owners.

To work as a Painter, you’ll need to complete a Certificate III in Painting and Decorating (CPC30611).

Complete a Certificate III in Painting and Decorating (CPC30611) at a TAFE institution, Registered Training Organisation, or as part of an apprenticeship. The length of the course can vary depending on the provider and delivery method.

Complete construction induction painting and obtain a White Card through a Registered Training Organisation. This is a requirement for anyone who works on a construction site in Australia.

Find out what specific requirements your state has in place for you to be able to contract, sub-contract or advertise for work as a Painter.

The good things

Painting is a great skill to acquire, there will always be work in this industry and it’s easily enjoyed, you can travel with the skills you learn , as a painter you often find yourself doing bits

The challenges

It can be difficult at times, for example you could be rolling a wall with low sheen , your pressing to hard with the roller head and it begins to leave a tail, if you don’t lay the paint of properly

Most Important Things to Do Before Painting Your House’s Wall Exterior

There is much planning involved when it comes time to paint your house’s wall exterior. In fact, before a fresh coat of new paint can be properly applied to the exterior of your home, the old paint must first be removed.

Because of this, it is highly recommended to hire professional paint removal services to make sure the job is done right, as professional painters have the tools, the know-how, and the experience to remove your home’s old paint properly. It is the proper preparation of exterior wall surfaces, the quality of paint, as well as the skill of the painters that will produce the best results.

The Importance of Paint Removal Before Painting Your House’s Wall Exterior

If you have ever wondered how the paint on some homes look so good, it is not only because of the quality paint used, but the proper preparation of the surfaces and application of the paint that matters most. Proper paint removal and the preparation of the surfaces, as well as the application of paint requires special training and the right tools of the trade. This is especially important for multi-story and heritage buildings that have unique architectural designs.

Importance of Hiring Paint Removal Services for Your Home’s Wall Exterior

While the need to remove old paint is very common, it is advised to hire professional paint removal services for the following reasons

Presence of mould and mildew – it is not uncommon to find extensive mould and mildew that have spread into the surface of old paint, walls, and even into the interior spaces of homes. Because the health risks involved with removing mould and mildew, it is highly recommended to hire professionals paint removal services.

Lead paint removal – while lead paint is not used anymore, on older homes and commercial building it can still be found. Removing and disposing of old lead paints requires specialised services.

Listing a property for sale – a newly painted house is much easier to sell, and if you want to get the most for your home, then hiring professional painters is a must.

Hire the right painting professionals

As a homeowner you like to ensure that your home is maintained well and that it stays looking good at all times. This is why you clean it with regularity and spend a large part of your weekends vacuuming, dusting and mopping etc. Even when you make all these efforts, it’s also important to spruce-up the look of your home and upgrade certain features.

When you are looking for a painting company, you will find there are a number of them that provide similar services. This makes it very difficult for you to identify which company you should hire for the job.

The few things you should take into account are:

Experience and reputation- Always check how long the company has been in business. Only one that has been operating in the field for a number of years would be able to understand what your specific requirements are and will provide customised solutions. While it’s important to hire a company with experience, it’s also very vital that you check the reputation of the company. Look for online reviews and what customers are saying about the company. This will give you a fair idea about how good the company is.

Type of services- Its crucial to identify why kind of services the company can provide. For instance, if you need your commercial property painted, you would have to look for a company that is able to handle commercial painting jobs. It’s the same when you are looking to hire someone to paint your residential property.

Customised services- The company you hire for the job should be able to provide customised solutions. Every property is different and every property owner has different requirements. This is why it becomes important for you to zero-in on Residential Painting  professionals that would be able  to cater to your specific

Licensed and insured- The company should also be fully-licensed and insured. This proves the credibility of the company and it also ensures your property has insurance cover when the painting work is in progress.

Aside from all these aspects, when you call the company,  check how responsive they are with your query and whether they promptly send someone over to your location to discuss the details of your project. As you can see, there are a number of benefits to getting Residential Painting.

THINGS TO UNDERSTAND ABOUT RESIDENTIAL PAINTING

One way to update the look of your house is to have it painted again. Once you have the walls of your home painted it is completely changed. Homeowners should look into professional painters to upgrade the look of their house.

A company that has not been around for long would lack the experience that comes with years of being established. While it may sound like the “cool” thing to do, never try to do a DIY project by yourself as you might end up ruining the whole thing which can end up costing you more.

Things to remember about Residential Painting:

1. Determine the kind of finish you want on your walls. Consider sheen and glimmer paints. Whether you choose sheen or matte finish, it will impact the final look. These days there are various kinds of finishes available. A good painter company will know which one would look better on your walls and can advise you accordingly.

2. Experimenting with colours is a good idea. It can add some texture and dimension to your rooms. There is a whole psychology to colours, for example, blue invokes peaceful feelings. Therefore, the paint colour has an impact on the overall vibe of the room. An experienced residential painter can help you out with choosing a suitable colour according to your needs.

3. Do not forget to look at the samples for the paint you want to choose. Make sure to look at it in sunlight, as well. Consult your Residential Painting company for a colour that you will like, as colours can look different when they are dried.

4. You can use a primer on your walls before they are painted. Some paints come with primer mixed with them. Primer helps cover any previous stains and will make the colour brighter. A final top coat will allow the paint to stay on the wall longer.

Is It Ever Too Hot For a House Paint Job?

What is the Ideal Weather and Temperature for Outdoor Painting?

Oil and latex paints both need to be applied when the weather is neither too hot nor too cold. In the winter, you really shouldn’t paint in temperatures below 40 degrees Fahrenheit for oil based paints and 50 degrees for latex based paints. In the summer, the high temperatures for perfect application are 90 for oils and 85 for latex paints.

Temperature is not the only consideration. Humidity plays an important role in the way paint dries. Too little humidity and the paint will dry too quickly for real integrity of the surface; too much will keep the paint from drying at normal rates, increasing the risk of irregular appearance, as well as damage by wind and detritus. The best humidity range for outdoor painting is 40-70%. Bet you’ve never checked the humidity before when doing DIY paint jobs!

What Happens to Wet Paint When it’s Too Hot Outside?

Both oil and latex paint have binding properties that only work properly in the temperature range already described. When the weather is too hot (especially in direct sunlight), the paint dries before it can fully bind, leading to cracks or peeling, now or in the future. For latex paints, direct sun on hot days or ambient temperatures above 85 degrees may dry the paint before it can be properly brushed out. This creates a horrible mess that will ruin an otherwise good paint job.

How Can You Paint Well on Hot Summer Days?

The best way to avoid damage to a fresh coat of paint is to “work your way around” a house or other property. When painting in the shade, outside of direct sunlight, you give the drying paint a couple of advantages. On the one hand, shade temperature is much cooler than the temperature of air in direct sunlight. The other benefit is that direct sunlight has radiation that increases the rate of drying even beyond the influence of temperature alone.

A Great Alternative To Solid Hardwood Flooring

Do hardwood floors need to be sealed?

There is a balance in creating a perfect finish that is both durable and beautiful. Maintaining this balance can often make the difference between a masterpiece that brings a room together, or a disaster that requires hours of work and tons of money to fix. It all starts with choosing and applying the right sealer. When you properly seal your hardwood floors, you lay the foundation for creating a stunning appearance that will stand the test of time. Here are a few reasons why sealing your hardwood floor is so important.

Prevents Reactions to the Wood from the Finish

You spend time and money putting down the perfect hardwood flooring.  You chose the perfect hardwood and the installation was a breeze.  You apply the finish but do not seal. Disaster strikes. Instead of bringing your room together, they are an eyesore you are embarrassed to show to your family and friends.  How could this disaster have been prevented?  By using a sealer.  When you seal your hardwood floors correctly, you prevent the wood from reacting with the finish.  The chemicals in the finish can damage the wood and leave your beautiful hardwood floors looking like a beautiful mess.

Prevents Particles from the Wood Mixing with the Finish

One of the best qualities of hardwood flooring is its natural beauty.  You selected hardwood flooring for your home or business because of its organic qualities.  Because it was once alive, it still possesses plant particles that can be pulled out of its structure.  These tannins and extractives can mix with the finish.  When they mix together, the extracts can cause the finish to discolor and even prevent it from adhering to the wood.  This is especially true if you are using wood that is oily in nature.  By sealing your hardwood flooring, you can prevent the rich, desired color from changing, and by using a sealant you will ensure that the finish binds with the wood.

Builds a Solid Base for the Finish

When you apply a finish to untreated wood, it will soak into the wood.  This soaking effect can not only damage your hardwood floors, but it can also increase the amount of finish you need to complete the job.  By sealing the wood first, you supply a base for the finish to sit upon.  With the finish sitting on top of the wood, there is a barrier that is created between the floor and the finish.  This barrier helps to protect the wood from damage and increases the life of the finish.  Not to mention that the less finish you use, the less money you will have to pay to get the desired result you are looking for.

Helps Produce the Perfect Color

The appearance and color of the hardwood can easily change during the staining and refinishing process.  For this reason, using a sealer is imperative to achieving the desired color.  Using a sealer gives you several options for how you want your hardwood floor to look.  Sealers can be used to change or preserve the natural color of your wood floors.  They can also be used to give your wood a three-dimensional look that cannot be accomplished by using finish alone.  With the expanding number of paint options available for walls, homeowners are equally looking for numerous color options for their floors.  Using a sealer allows for greater diversification of color options.  Color options from greys and rich blacks to whitewash and natural are now available because of sealers

Oil and Water

Beyond the application of stain and/or sealer, it’s essential to apply a water- or oil-based finish to protect the wood. The choice depends on the type of wood, desired results, color and grain pattern. Neely notes these distinctions in polyurethane finishes (as well as the fact that floor installers usually have strong preferences about one kind or the other):

Water-Based

  • These fast drying, water-based finishes need to be applied with focus to avoid brush or lap marks.
  • They let the natural color of the wood come through.
  • Many flooring professionals consider water-based finishes to be superior to oil-based finishes.
  • They are often recommended for many types of exotic woods.
  • Because they are water-based, they are considered environmentally responsible.

Oil-Based

  • Oil-based polyurethane finishes add more color and depth to most woods: an ambering, yellow effect over light woods while darkening the hue of stained and dark woods.
  • They are more forgiving than water-based when application is uneven.
  • The drying time is 12 to 24 hours, so plan accordingly.
  • Oil-based finishes enhance the wood of species such as walnut and red birch. (Water-based finishes can wash out rich, dark woods.)
  • Hand-rubbed finishes occasionally are used on special wood. Tung oil is an alternative for rustic or reclaimed-wood floors to get a natural look.
  • Neely adds that satin finishes are an overwhelmingly popular choice. “A low sheen offers a natural look that shows less wear. High gloss will show wear easily.”
  • Beyond the manufacturer’s recommendations, Neely recommends that contractors who are unsure about the type of finish or care instructions contact a flooring expert.

Types of Finishes for a Hardwood Floor

The type of finish you choose depends on the look you want for your floor. Durability is also an issue. Your choices are

  • Polyurethane: Either oil- or water-based, polyurethane comes in various degrees of luster and has a sort of plastic look. Both finish types darken or even yellow wood, although some newer water-based products don’t darken as much. Poly finishes are excellent for high-traffic and high-moisture areas. However, if the finish gets nicked or gouged, it’s extremely difficult to spot-repair.
  • Varnish: Varnish comes in a variety of lusters, from matte to glossy. The higher the gloss, the more durable the surface. Varnish often darkens with age. On the up side, you can make spot-repairs to varnish.
  • Penetrating sealer: This offers a natural-looking finish that brings out the wood’s grain; however, it may darken over time. Penetrating sealer offers good protection, especially when waxed. However, it’s less durable than polyurethane or varnish. It’s the easiest of the three to spot-repair, though.

Ideally, you want to seal the floor on the same day you finish sanding to prevent the open wood surface from absorbing moisture. For best results, apply the stain (if desired) and sealer with a sheepskin applicator. Be sure to apply the sealer evenly, and use enough to cover the surface. But be careful not to apply too much. Excess sealer doesn’t soak into the wood — it pools on the surface. If you fail to remove it, it leaves an ugly, ugly spot.

How to Clean Hardwood Flooring Safely

No matter what type of sealer or finish your hardwood has, the basic cleaning rules are the same. Above all, avoid excess moisture when cleaning, and always wipe up liquid spills and pooled water immediately. There’s no need wet-mop or steam clean a wood floor, and both of these methods can damage the wood.

The most important cleaning objective is to keep the floor free of dirt and grit, which scratches and dulls the finish as the floor is walked on. Sweeping or vacuuming regularly is the best way to keep a finish in good shape over the years. It’s ideal to sweep or vacuum daily, or at least every few days. Vacuum with a hard flooring attachment on a canister vacuum or a use the hard flooring setting (with no beater bar motion) on an upright vacuum.

If the floor needs deeper cleaning, use a towel or cloth or a sponge or microfiber mop (don’t use a string mop, which retains too much water) slightly dampened with warm water. Move the mop parallel to the floor boards, and rinse frequently, making sure to wring out the mop thoroughly each time. Finally, dry the floor with a towel to remove any residual moisture.

How You Will Benefit By Having Your Engineered Wood Floors Sealed

  • Reduce the costs related to water damage repair

Water damage repair can be costly, time-consuming and stressing. Your floors might need more than one repair to bring back the new look, but this is never a guarantee. The point is, you might have to spend more than the initial cost required for engineered hardwood floors installation. Sealing your hardwood flooring protects your floors from leaks and spills of water that may lead to unnecessary water damage repair costs.

  • Maintain the charming look for an extended time

One of the reasons you might want to consider engineered hardwood floors installation is the beauty in it. But what good is that charming look when it can be ruined in time? Sealing your floors leaves a water-resistant coating on your hardwood flooring. This coating prevents the water from soaking and damaging your hardwood flooring. But not only that. A proper seal will also add some sparkling look making your home look beautiful.

  • You won’t need to replace it anytime sooner

Water damage repair and replacement costs can be expensive. It will soak your floors, leaving stains and splits that will spoil the charming look of your hardwood flooring. The last thing you want to do is replacing your floors sooner after the installation. Sealing your floors will keep your engineered floors installation intact for a longer period. It adds a protective layer that prevents your floors from absorbing water leaks and spills that may damage your floors.

  • It is affordable

One great advantage of having your hardwood flooring sealed is, it doesn’t take too much. You only need a few dollars to seal up to 10 meters of your floor, which is much lower than replacements and water damage repair costs. So, why would you want to spend more when you have a better option? None. Sealing your hardwood floor doesn’t just add some charming look. It also helps maintain the initial look for a longer time at an affordable price.

  • Increases the value of your property

Who wants to buy a home with damaged floors? Many home buyers will use your flooring to value your house. They’ll be looking for dents, splits or anything that might give them an excuse for wanting to pay lower claiming they will have to repair it later. Besides, repairs are stressing and time-consuming. Sealing your hardwood flooring adds value to your property. It will prevent the water leaks from soaking, splitting and leaving stains on your floors that might compromise its value. A properly maintained and sparkling clean floor might be profiting, especially if you have plans of selling your house later. In fact, it is also one of the tricks to get your house rented faster.

Practical Guidelines For Kitchen Remodeling

BENEFITS OF KITCHEN RENOVATION

Renovating your home can not only make it more pleasant to live in, but can also help increase your home value. However, certain home improvements will provide a higher ROI (return on investment) than others. For a high ROI, you can’t go wrong with a kitchen renovation.

The following are seven benefits that you’ll get from a kitchen renovation:

Improve function – There are several things that you can do in your kitchen renovation to improve its overall function. For example, adding more cabinets or extending your existing cabinets to the ceiling can help provide more storage space. Or if you want to go even further, knocking down the wall between the kitchen and living space can allow you to add more counter space. Simply upgrading some of your kitchen appliances or lighting fixtures can help make the kitchen more functional as well.

Reduce energy costs – Upgrade your older kitchen appliances to more energy-efficient models to reduce the amount of energy your kitchen uses. Look for refrigerators and dishwashers that have the Energy Star label, which signifies that they meet or exceed the energy efficiency standards set by the EPA (environmental protection agency). Replacing traditional lighting fixtures with LED models can be a great way to reduce your long-term energy use as well.

Improve sustainability – Upgrading your kitchen appliances to more energy efficient models will help make your kitchen more eco-friendly, but it’s not the only thing you can do to create a more sustainable kitchen environment. Install low-flow water faucets to reduce your water use and consider materials that are sustainable – such as bamboo, salvaged wood or recycled materials – for your countertops, cabinets and flooring.

Update the look – If your kitchen’s visual design is trapped in the 1970’s or 1980’s, then it could probably use a visual update. You can change the entire appearance of your kitchen by simply re-painting the walls and cabinets, and by upgrading all of your cabinet hardware. Of course, you can go the extra mile and install new cabinets, new countertops and new floors as well.

Increase comfort – A kitchen renovation can improve comfort in a number of ways; for example, better ventilation can help reduce the odors and heat that cooking in the kitchen produces. Installing a kitchen island that provides seating space can be a great way to add an additional dining area to your home. Adding larger windows can help bring in more sunlight.

Improve safety – Upgrade outdated kitchen appliances to avoid injuries caused by improper function. You can also implement universal design, such as by installing a wall oven, to help prevent injuries caused by physical overexertion.

Improve home value – Depending on the extent of your kitchen renovation, you could recoup as much 70 percent of your kitchen renovation costs. Not to mention that a newly renovated kitchen often attracts homebuyers if you’re looking to sell.

KITCHEN REMODELING: AN OVERVIEW

Remodeling your kitchen is not an easy task. Here are some things to consider when deciding whether or not to do a kitchen remodel.

Hiring a general contractor to manage the kitchen remodel has several benefits. While it may seem expensive, think of the time, knowledge and professionalism a contractor brings to the table. If you have the courage to do the remodel yourself, be sure to educate yourself on the entire process and develop a good plan. Either way, take into consideration that you will have to live without a kitchen for several weeks but the finished product is worth the wait!

things to consider before you begin the kitchen remodeling process:

1. Speak to someone who has been through the process already. Find out what they learned and ask them if they had to do it over again, what they would change. Many people find that by making a list of needs and wants, helps prioritize the must haves and the would be nice to have. This also helps determine what you can and can’t afford. Ask yourself what is working in your current kitchen and what definitely needs to change. Are you finding yourself wishing you had a double oven? Do you lack counter space? Establish a prioritized list of things you would like in your new kitchen, ranked according to their importance. It’s helpful to distinguish between those elements you absolutely need and those you simply want.

2. Logistics and Expenses Kitchen remodel projects involve a lot of work and just like you see on those reality shows, things may happen unexpectedly that can cost you more money. If you hire a contractor to do the job, a lot of the work may be handled by subcontractors. That means that you could have strangers in and out of your house through the entire process. Contractors will give you an estimate as far as how long the project will take but be flexible. Some unexpected challenges may arise that are out of their control. If you do the job yourself to help save money, ensure you have your plan in place and that you have fully educated yourself on the process. A new kitchen could potentially have rewards further down the road. If you decide to sell your real estate, your newly remodeled kitchen might help increase the overall value. But, don’t expect a full return on your investment. Your dream kitchen may not be the next person’s dream kitchen. Also, ask yourself, how long do you plan on being in your home. If you have a 2-5 year plan, then maybe a surface-level kitchen remodel is all you need.

3. Prepare yourself that it may not be a completely seamless process Again, talk to some professionals and get some help with planning, design and overall management. Professionals can help you decide whether or not to spend the money on top of the line wood cabinets and Italian marble floors or, work within your budget and recommend porcelain floor tiles. They can also help you decide if you need commercial grade appliances or if quality consumer grade stovetop will do just the same.

Everything You Need to Know About Kitchen Remodels

A kitchen remodel can completely transform your home. The kitchen is the heart of your home; it’s where days start and finish, where everyone in your home gathers (even if it’s on the run) and where lots of memories are made. Your kitchen is also one of the few spaces in your home that needs to be functional for every family member. Finding a balance while figuring out how you will remodel your kitchen — between the styles and preferences you love, functionality, and budget can be a difficult task.

We’re here to walk you through kitchen remodels so you don’t have to go at it alone. From budgeting your kitchen remodel to choices on everything from cabinets to flooring, there are a lot of decisions to make!

Budget & Investment

The first question most homeowners have before starting the kitchen remodel process is; “How much is a kitchen remodel?”. The cost of your kitchen remodel will vary greatly depending on the type of upgrade you are planning on — basic updates, mid-range upgrades, and total renovation/high-end upgrades.

Kitchen Remodel — Basic/Low-Cost Upgrades

Leave the cabinet boxes in place and replace or paint the front of your cabinets. You’ll also want to replace all of the hardware. Scroll down to learn all about your cabinet choices!

Replace cooktop/oven range and refrigerator with new energy-efficient models.

Replace laminate countertops; install midpriced sink and faucet.

Repaint trim, and walls.

Consider extra one extra feature or two that will make your kitchen more functional — this could be something like an above-the-stovetop faucet or pull-out spice racks.

Mid-Range Kitchen Remodel Upgrades

Semi-custom wood cabinets.

Added or upgraded kitchen island.

Replace laminate countertops with granite, marble, or stone.

Double-tub stainless-steel sink with new automatic faucet.

Energy-efficient range, ventilation system, built-in microwave, dishwasher, garbage disposal, and custom lighting.

Add new flooring.

Finish with painted walls, trim, and ceiling.

Ways to Save on Your Kitchen Renovation

The average national cost to update a 200-square-foot kitchen, including installing new flooring, semi-custom wood cabinets and standard appliances, is roughly $62,000, according to Remodeling magazine, which tracks the cost of home improvement projects annually. Adding luxuries like stone countertops, a built-in refrigerator, a commercial-grade cooktop, designer faucets and top-of-the-line custom cabinets can bring the cost to about $123,000, on average.

BRING OUT THE PAINT “A bold color and modern hardware can breathe new life into old, ordinary cabinetry,” said “The dark-blue glossy paint added a sophisticated pop to what had been a drab and dated wood kitchen,” said

REFACE THE CABINETS For cabinet fronts made of material that cannot be painted or stained, consider refacing, also known as resurfacing, which involves keeping the existing cabinet framework and replacing all the doors, drawer fronts and side panels with new ones.

She also added rollout shelves and a new range hood. “Then we painted the center open wall a charcoal gray, to add depth and contrast, and got some great Boffi linear pendants over the island, which changed the whole tone of the kitchen,”

Another way to reduce the cost of cabinetry is to use particleboard where no one will see it. “A lot of people think they have to have all-plywood kitchen cabinetry, and they don’t,” said

THINGS TO FOCUS ON FOR KITCHEN REMODELS

Renovating or remodeling a kitchen is exciting, but can be overwhelming. There are a lot of decisions to be made. From lighting to flooring, cabinet color to knob style, every element of your kitchen remodel comes together to create a beautiful space to share with friends and family. Planning is essential for a successful kitchen to remodel and for first-time renovators that are some tips and tricks we recommend abiding by to reduce stress.

Find Your Flow

A productive and streamlined workflow is essential for any functional kitchen. Many novice kitchen remodelers fail to consider the efficiency of the space. There may be times where there are a lot of bodies moving around your kitchen performing multiple tasks simultaneously. You want to make sure that you optimize the space you have. The refrigerator, stove, and sink should be positioned in a fashion which allows for easy access from one to another. Spacing these appliances out into triangle design will allow for an effective workflow. A kitchen island can also take advantage of unused space and provide extra counter space and storage.

Details, Details, Details

The organization is key in a well-managed kitchen. Ask your Cabinet Discounters staff for built in organizational aids such as drawer and cabinet inserts and dividers. A good organization system can save you stress on a daily basis. Every knife, spice, and Tupperware should have its place in your new kitchen.

Do Not Budge On Your Budget

Before you begin your kitchen remodel to make a list of what you must have in your kitchen. Stick to this list and stick to your budget. It can be easy to get sidetracked by extra bells and whistles and suddenly your remodel cost has doubled.

Design Around Appliances

Pick your appliances first. It is much easier to design your custom cabinetry and countertops around the appliances you want. Appliances can not be resized, counter tops can. Pick out your dream appliances, but be sure to save 1/3 your budget for cabinets.

Long Distance Moving Tips To Save You Time And Money

Frequently Asked Questions about Long Distance Movers

What should I know about quotes?

When you receive a quote for your move, understand that the first price you receive will rarely be the exact amount of the full price. Remember, these quotes are rough estimates meant to attract your service. Here are a few ways to ensure you get an accurate estimate

Get an in-person quote: The Federal Motor Carrier Safety Administration requires all long-distance movers to offer an in-person quote. If you live within 50 miles of your mover’s local office, they will walk through your home and give you the most accurate quote possible.

Talk with your moving agent: If you do not live close to your movers, talk with the people handling your move. That way, you can communicate more clearly the belongings you need moved and arrive at a more accurate quote.

Binding estimates: When you get a quote, you will often have the option of a binding or nonbinding estimate. In a binding estimate, you will pay the the estimated amount regardless of how much you’re shipping. If the mover underestimates how much you need to move, they cannot charge you extra. Likewise, if they overcharge you (which is the more likely outcome), you’ll need to pay.

Nonbinding estimates: A nonbinding estimate is simply a quote to give you an idea of shipping cost; the actual amount you owe will be agreed upon in a contract. This is the more common type of estimate.

How do I know if my mover is certified?

Before you sign any paperwork or even proceed with a moving quote, check to make sure your company is licensed by the Federal Motor Carrier Safety Administration (FMCSA). FMCSA makes sure the moving company follows safety regulations when they transport your belongings over long distances. If you ask to see your mover’s FMCSA license, and they don’t provide it, look somewhere else

You can check this licensure at the Department of Transportation’s website. Search their database to make sure your movers are safe. Other credits, like safety and reliability ratings from AMSA are also strong indicators of reliability. Essentially, the more certifications from reputable sources a company has, the more likely you are to find a company that puts you first.

Keeping all the above information in mind, we still have some final pieces of advice while you look for your movers. Here are some helpful tips for making your choice:

Be careful with brokers: A broker will find you a good deal, but keep in mind the movers will be from a different company. If you go with a broker, research the moving company they recommend to make sure they are certified.

Get your quotes in writing: Movers are required by law to provide you with a written estimate. If they only offer a rough estimate while promising a more complete bill after the move, you should find someone else.

Double-check certifications: Make sure the mover has an FMSCA license and they’re registered with the Department of Transportation. Check and see if their licenses are current by reading it from their website or asking an employee. An established moving company will have a license that’s at least three years old.

Know their reputation: Check their company history by seeing what others have said about them. Also, check their record with the Better Business Bureau. See if they have a history of complaints.

Don’t sign until you’re sure: Do not let movers pressure you to sign a contract until you’re sure you’re making the right choice. Don’t sign anything that’s incomplete, and keep copies for your personal records.

Long Distance Moving Tips You’ll Ever Need

Moving long distance across the country is viewed as the most challenging type of relocation there is, right after moving to another country (an international move). And to be able to guarantee the success of your upcoming cross-country move, your best option is to have a master plan about what you should be doing each step of the way. And, of course, how you should do it too.

One thing is sure – you’re going to have to be ready for your long-distance move. And this is exactly where good advice will come in very handy. These top long-distance moving tips will guide you throughout the entire house moving process – from the very first moment your move becomes only a matter of time (start point) until the day your household items are delivered to the new home that’s located many, many miles away (end point).

Create a long-distance moving plan ASAP (Moving Checklist)

Moving long distance requires a lot of planning and you shouldn’t waste another day wondering where to start or what you should do next. The solution is simple: you need a plan that works, and you need it right now.

Don’t make the biggest moving mistake

These tips for planning a long-distance move will help you organize a problem-free household move from start to finish. Nevertheless, costly mistakes are never out of the question.

Get in-home moving estimates from reputable movers

In order to prepare a preliminary moving budget, you’ll need to know how much long distance movers cost. Or in your specific house moving case, how much those cross-country movers will charge YOU.

How to Pack for a Long Distance Move

Packing for a long-distance move might be a very tedious task but only if done without any guidance. The whole move requires a lot of time, effort and finances which may be easily minimized if you follow simple guides on how to pack for a long-distance move, just like this one. Don’t forget to also take in mind the best day of the week to move.

General Long-Distance Moving Advice

Plan in advance.

Long-distance moves don’t happen spontaneously, this is a meaningful step in your life that requires planned decisions and attention to detail. Everything related to packing, insurance, safety, speed, delivery destination and affordability should be taken into consideration in advance.

Deal with regulations.

Each country and state has specific regulations for people moving into it. Check what you have to comply with if you move personal belongings from another country into. If you break any of the rules, your belongings or the vehicle that transports them may be seized (If you are moving to the US look for full container load services. Your effects are packed at your home and loaded directly onto a more than 20ft container and transported directly to the docks to await the next scheduled sailing.

Research the moving company.

Not all service providers are loyal. Some will trick you into booking service and will offer a low-quality experience you’ll never forget. Always read previous customers’ reviews that are legitimate and check local forums for people who have shared more information. Moving with an unauthorized company may also lead to ending up as a victim of a fraud.

Calculate your expenses.

It’s always good to have a general idea of the approximate price for the move but don’t expect it to be 100% accurate. Upon booking the service, there are plenty of things that may impact the final price, so always be prepared for surprises. Generally, most long-distance moves cost more because of the higher expenses and working hours of that are needed for the completion of the job. And don’t forget to cancel your council tax when you move.

Make a moving checklist.

Fortunately, we have already prepared a moving checklist for our readers. Instead of wasting time on making one for you, see what our moving house checklist includes.

Leave lightweight items where they were.

If something is not going to be disassembled, you don’t have to remove what’s contained inside of it – this will cost you time and effort.

Separate important papers and documents from the rest of the luggage.

You may need to pull out your ID, driving license or other documents at any time, carry these in a purse or a backpack so they are easily accessible.

Pros and Cons of Your Long Distance Moving Options

Long distance moves can be one of the most challenging things you might ever undertake. There are many choices to make in deciding the best way to move your household state to state, including full service moving with long distance moving companies, and various do-it-yourself moving options. Here is your pro and con list regarding the various interstate moving options.

Move using only your own vehicle.

Pros:

You can save money by driving your own car yourself. All you need are gas, caffeine, and pit stops.

Cons:

You have to pack up your items and your car yourself.

You have a finite amount of space; so, you can only take a smaller amount of items and may have to leave a lot of things behind that will need to be replaced at your new location.

This strategy may work for people without furniture or college students moving out of dorms, but most people will have difficulty fitting all their belongings in their personal vehicle..

Depending on the length of the move, you may have the expense of staying overnight in a motel(s), if moving across the country.

It is recommended that you pay to get a checkup for your car to avoid problems, such as breaking down in an unfamiliar place while driving state to state.

Rent a trailer.

Pros:

Renting a trailer allows you to take more of your things with you than a personal vehicle. If you have a small amount of furnishings and want to do it yourself, this could be a good option.

You may save money vs. other options.

Cons:

You need to clean, declutter, and pack, load, and unload yourself.

In order to pull a trailer you will need a trailer hitch that is connected to the wiring of your car for safety signals, which may be an added expense.

Depending on the size of the trailer, you may need a larger SUV or truck with towing capability.

You may be unfamiliar with driving a trailer and have some unease maneuvering, parking, backing up, etc.

Your gas mileage will take a hit when pulling a trailer; requiring more frequent stops to fill up.

Motel stays on interstate moves; and more difficulties parking a long trailer.

There may be toll charges state to state.

Most truck rental companies charge extra fees for mileage.

You may be required to pay insurance fees for the trailer.

Moving one way will require a drop-off fee.

Typically, you have one day to unload or incur late fees.

You have to clean, unload, and set up your new place by yourself after a long drive.

You may need to obtain permits and endure other logistical hassles at your old or new location to keep the trailer in a convenient location for loading and unloading.

You may also need to clean the trailer before returning or incur an additional fee.

LONG DISTANCE MOVING

Movers is a fully licensed and insured interstate moving company. Movers can move you, within your state or across state lines

How it Works

can provide you with a general cost estimate over the phone that covers all of your interstate moving needs: movers, trucks, fuel, moving pads and equipment, loading, driving to your new city and unloading. Everything is included

Movers will arrive at your home at the agreed upon date and time. will protect your floors, door jambs and walls, complete any packing that agreed to do, disassemble items as required and perform an itemized inventory of the things are moving out of town. Once things are ready to move, will load the truck. When the truck is loaded, the driver will verify your new address, collect any last-minute instructions and confirm the date and time for your interstate delivery. will see you at your new home and you can travel leisurely without the hassle or worry of loading or driving your own truck.

Licensed for Long-Distance & Interstate Moves

Your movers should be listed as ‘Authorized for HHG’. We operate under USDOT 2294507, Interstate Moving Company Authority MC-783481. Just having a DOT number is not enough.

Check to see if your mover is licensed to do Interstate moves »

View the OCP-100 Rights and Responsibilities When You Move »

View a sample of the American Moving and Storage Association Arbitration Program »

Check to see if your mover is licensed to do moves within Virginia » (NOTE: You will find us under “Home Town Services LLC”.)

Things To Do To Become A Wedding Photographer

How do you negotiate a wedding photographer?

Weddings are expensive, we get that! And it’s totally understandable that you would want to try and save money where you can. There are many blog posts out there that will tell you that an area you can save is with photography by trying to negotiate pricing with your wedding photographer. Honestly, our question is, why is photography deemed the best vendor to try and haggle with? Wedding venues, caterers, coordinators, etc. all have their set prices. Why would you expect to negotiate pricing with your wedding photographer?

Photography is one of the most important things you’ll pay for a wedding. Maybe we’re being biased, but we don’t think so! After the wedding day is over, the only thing left to remember your day are the images. Wouldn’t you want the best you can pay for? Trying to negotiate pricing with your wedding photographer (like many other business owners) can be quite offensive to them.

Asking for discounts can be offensive.

Why is it offensive to ask for a discount? It’s offensive because running a business costs money and photographers value their art and time. By asking for a discount, you are essentially devaluing them. The message that many photographers hear when they are asked for a discount is. “I love your work! I want everything you have to offer. But I don’t think you or your time is worth the price you are asking”.

Why are wedding photographers priced the way they are?

You may see a quote and think that that number is really high. That the photographer can afford to drop their price for you. But the reality is that many photographers have worked set their rate. These are based on the cost of doing business and what they need to pay themselves.

So what does that mean exactly? Well, that number that you are being quoted is not how much the photographer is pocketing. At least 30% of that will go straight to taxes, next the photographer has to cover his/her business expenses. Some will be put back into the business and the rest will be what the photographer takes home. That means that 40-50% of the quoted amount, the photographer will never actually see.

Without knowing what all goes into photography, it is also easy to think that you are just paying for the hours that your photographer will be at your wedding. But, please realize that a lot of work goes into serving you before and after your wedding day too. That quoted amount pays for your photographers time when he/she communicates/meets with you before the wedding, preps to capture your photo wish list before the wedding, and all the hours it takes to edit your images and get it to you. Most wedding photographers aren’t trying to rip you off, they are simply trying to earn a liveable wage based on the time they are committing to serving you and preserving your memories.

We know you don’t mean harm.

All that to say, if you love a photographer’s work, please think twice before flippantly trying to negotiate pricing with your wedding photographer. Wedding photographers are small business owners. We’re not like car dealerships that upcharge, knowing that haggling will be involved. Neither you nor your photographer wants to start your relationship off with offense or awkwardness. As photographers, we want to be able to wholly serve you and capture your memories. Feeling like their art and time isn’t fully appreciated only puts a sour taste in their mouth and dampens the joy they feel about serving you.

Negotiate with wedding photographer:

  • Book multiple sessions/prints: if you want to have a better price, first of all, you should book more than one session/prints with the same photographer. It’s like buying things. You cannot ask for a better price if you buy only one item.
  • Book early in advance (1 year to 6 months in advance). Many photographers, including us, usually have special offers for early booking. Book as soon as you can after you do proper research. This also helps you lock the photographer’s current pricing.

These are things that I could have told her, but I didn’t since she already set the date. But if you haven’t, these things are worth considering:

  • Have your wedding in the slow season. It depends on where you live. In Northern California, it is from November to April. Having your wedding in those months gives you a reason to negotiate with the photographers.
  • Have your wedding on a weekday. If you don’t want an off-season wedding because of the weather, the available flower, etc., having your wedding on a weekday can save you a lot too.

Those two things above can save you not only on photography but also on the venue, catering, makeup, etc. So, do a research and see how much it can save in your particular area.

What you shouldn’t do:

Don’t tell a photographer “The other photographer gives such and such for the same price.” or “They give me the same coverage for such amount.” In retail, you can easily ask for a price match with the same item because it is comparable. But in fields like this, there is no straight comparison, and it can be a huge turn off to negotiate with wedding photographer.

Remember:

  • Even if budget is not an issue for you, you should ask too. A saving here and there can be a spending for something else, maybe an extra album for your parents, a live band for the reception, or bigger gifts for your wedding party.
  • Even if budget is an important factor, your decision shouldn’t be merely based on discount. You decide to contact a photographer because of his/her style, not because of his/her willingness to discount. Try to allocate budget for other things and see if you can work it out. In the end, this is your one-time investment, and the photos are the only visual things that can tell you exactly how your wedding was 30 years ago.

When you really want to work with a wedding vendor, but their packages will stretch the budget too far, you have three options:

Don’t say anything and go elsewhere

Subsequently leaving your vendors scratching their head why you fell off the face of the earth with nary a word…leaving them wondering ”Was it something I said?”.

Ask for a discount

Certainly an available tactic, but assuming you’re talking to seasoned professionals who run a successful business and therefore know their costs and their value, it’s unlikely to be successful as a standalone strategy.

Negotiate

Not the icky used-car salesmen type: Quite the contrary.  When broken down to its basic principles, “negotiation” simply means to have a discussion about what each person wants, and toss ideas around until something sticks.

Sadly, negotiation is not a skill that many of us are taught, so when it comes to your wedding, most people are not well-equipped to do it effectively.

But, you will find that most wedding professionals welcome your input and request for alternative options!

A Few Key Things to Remember

Before we get started, I want to touch on a few concepts that I think are important to remember, for I think many people wrongly assume that negotiating means demanding what you want and not taking “no” for an answer.

First – Vendors Want Your Wedding

It might sound silly to state this, but you have to remember that wedding vendors WANT weddings. 

Don’t assume that just because you’re going to ask for a modification or have a special circumstance, that they will automatically not be interested in working with you.  Give them the opportunity to serve you. 

Second – Wedding Professionals are People

As service-based businesses, most wedding vendors are their business, and their business is them.  A hard nosed approach might work when negotiating with a mega corporation, but when the person on the other side of the table is the one who will be the one providing the service, a bit of acknowledgement for their time and talents goes a long way!

Know What You’re Negotiating For

While price is  an obvious point of discussion, it is not the only thing there is to negotiate.  So, what exactly is your sticking point?

Terms

“I am not comfortable with this policy”

Turnaround

“I would like it done faster”

Timing

“I want to start earlier; I want to start later”

Products Included

“I’d rather have this than that”

Availability

“I want you on a specific date”

Shipping / Delivery

“I want it included; I want a specific delivery method; I need it overnighted”

 Processed with VSCO with fp8 preset

Total Price

“I can only spend X”

Allocation of Budget

“I’d rather put money toward X”

Quantity or Size

“It’s too big or not big enough; it’s too many or too few”

Features Available

“I wish it did X”

Staffing

“That’s not enough to handle our needs; that’s too many to manage”

Access / Special Treatment

“I want pictures/my ceremony/to get ready in this VIP spot”

The Scales Of Criminal Defense Attorney

What does a lawyer do everyday?

Lawyers are some of the most hardworking people out there. They put in many more hours of work compared to those in other professions. In fact, what you might see on TV, like lawyers relaxing, chatting and enjoying lunch with clients, is not realistic. The truth is, lawyers work between 50 and 60 hours weekly on average. 

In fact, the many hours law students spend to get their degrees are both preparation and practice for them to work hard. This is because of the many obligations these lawyers have to fulfill, and it is simply much more than just showing up in court to make some passionate speech to defend their clients. Here is a sample of an ordinary day for a lawyer in a private practice.

How lawyers start their day

The activities and list of tasks of a lawyer are largely dependent on his or her specialisation, or the area of law that they practice. This means an attorney who is focused on labour law or personal injury will spend more time in administrative hearings or courtrooms as opposed to those who work in real estate or business law. 

What is common between many lawyers is the very early start to their workday, as you can expect them to be the first to arrive in the office in the morning, every day. The main reason for this is that they feel more productive when the office is not officially open for the day. This means there are no phone calls, client meetings, or court appearances so they could focus on the other tasks on their to-do list. 

They choose this time to either respond to emails or other correspondence or read up on any messages or memos they received. Those lawyers who will head out to court afterward will use this time to review their cases and get ready for the hearing. They might also try to finish some other tasks they cannot accomplish when they are out of the office for the next few hours.

Lawyers also have to prepare a lot of documents related to their active cases, including motions, memorandums, pleadings and similar paperwork. This takes time and mornings are perfect for these tasks because it is quiet enough and their minds are still fresh and alert.

Business hours

Even though emails and text messaging seem to have replaced telephone conversations as the preferred method of communication for most of the population, phone calls continue to play a key role in a day in the life of a lawyer. For example, the typical personal injury attorney and workers’ compensation lawyer must set aside time each day to make or return calls, particularly to the following:

  • Clients: The use of letters or emails to update clients about the status of their cases will not replace a telephone call from the attorney to answer client questions or to respond to concerns a client might have about a case.
  • Claims adjusters: Insurance claims adjusters are busy people, so getting them on the phone to discuss a case may not come about without leaving messages and returning their calls. Speaking to adjusters is the only way personal injury or workers’ compensation attorneys can settle cases on behalf of clients.
  • Attorneys: It is important for a lawyer, regardless of the area of law in which they practice, to discuss cases with co-counsel or opposing counsel. Attorneys might see each other in court or at administrative agencies, but it is easier to have a meaningful conversation about a case when it is conducted away from distractions and at a time when both attorneys have access to their case files.

On those days when an attorney is not heading out to court or to an appointment, the time in the office is spent seeing clients, preparing pleadings, reviewing correspondence that comes in, and attending to other matters that need to be completed as part of representing the firm’s clients. There are also other tasks that solo practitioners or partners in law firms must attend to that are related to the running of the practice. These tasks might include:

  • Marketing: Attracting new clients to a practice is essential to its existence. The internet has opened the door to a new array of marketing tools that attorneys must become familiar with in order to make the best use of them.
  • Personnel and staffing: Hiring and training attorneys and support staff take up a considerable amount of an attorney’s time when it is necessary to add or replace someone.
  • Continuing education: Lawyers must take courses to stay current in their knowledge of the laws and thus remain in good standing with their state bar association.

Typical Day At Work

On a daily basis, Lawyers analyze the probable outcomes of cases, using knowledge of legal precedents. They supervise legal assistants.

A typical day for a Lawyer will also include:

  • Advise clients concerning business transactions, claim liability, advisability of prosecuting or defending lawsuits, or legal rights and obligations.
  • Confer with colleagues with specialties in appropriate areas of legal issue to establish and verify bases for legal proceedings.
  • Prepare, draft, and review legal documents, such as wills, deeds, patent applications, mortgages, leases, and contracts.
  • Study Constitution, statutes, decisions, regulations, and ordinances of quasi-judicial bodies to determine ramifications for cases.
  • Act as agent, trustee, guardian, or executor for businesses or individuals.

Life in Government:

There are lawyers at every level of the government — local, state and federal. You could work as a prosecutor; public defender; administrative, executive or legislative staff; or military attorney. As a prosecutor, you would represent the government in prosecuting crimes and as a public defender you would represent criminal defendants who could not afford to hire lawyers on their own. Government attorneys also handle civil cases in which the government is involved. Working as an attorney in an administrative agency or an office in the executive or legislative branches, you could draft, research, provide advice on and enforce laws, rules and regulations.

Committed to making a difference

Regardless of the number of hours worked each week or the area of law in they practice, a day in the life of a lawyer is aimed at achieving a favorable result for a client. For personal injury and workers’ compensation lawyers, what an attorney does each day can change a person’s life through a settlement or verdict that provides the money needed to allow the person to recover from an accident and injury.

Things Lawyers Wish You Would Understand

Every lawyer is different, and practices a different type of law, but here are seven things most lawyers probably wish you understood about they job.

1. Legal stuff takes time. Lots of time.

On every episode of The Good Wife or How to Get Away With Murder , a client hires a lawyer in the morning and then everyone seems to be in court by the afternoon. Unfortunately, in real life, court cases take months, if not years to complete, especially if you are dealing with the federal court system. Many types of cases have waiting periods before you can even get a trial, and others are subject to mandatory arbitration (basically where you present your case to a person who is not a judge who helps decide it).

Not only do most legal cases take forever, the end result is very rarely a dramatic trial. By some counts, 80 to 92 perent of civil cases settle out of court. And the same is true for criminal trials as well. There’s a big reason for that: As cool as it is to think of having our Atticus Finch moment, most of us remember that Atticus lost that trial and would prefer to avoid that risk. After all, it’s a much safer bet to accept a deal that you know is okay, than to run the risk of getting nothing, or your client going to jail.

2. When trials do happen, they are incredibly boring.

Anyone who’s had jury duty knows that trials are usually tedious and plodding. Believe me, lawyers know this too, but most of us can’t control the urge to talk a lot — using really big words — even when we’re awful public speakers. The people that suffer the most are court staff (and I should know, I used to be a court clerk). These poor souls have to endure attorneys droning on day in and day out, with only the occasional interesting moment. (I remember one fun day when I was a court clerk where a woman started breastfeeding her four-year-old during her testimony).

Also, court stenographers don’t exist in most places any more. Everything is recorded instead.

3. We most certainly can handle the truth.

The kind of witness questioning you see in the movies and on TV is — and I know this will be a shocker — are much more dramatic than real life. Both witness and lawyers prepare extensively for trials, and maybe once in a blue moon does a witness say something so surprising it changes or ruins the entire case (though I have seen that happen. Once).

In federal court especially, the rule precludes “trial by surprise” because parties have to provide exhibit and witness lists to each other weeks in advance. Furthermore, there are extremely stringent rules about how a lawyer can ask questions and about what. We do yell out objections like “hearsay” a lot, but we don’t go into elaborate speeches while a witness is testifying, unless you’re one of those overly word lawyers that everyone hates.

4. Most of our job is reading, writing, and paperwork.

Seriously. There is a reason most trials are boring, and it’s because all lawyers are taught to do in law school is read and then write about the things we read. A huge hunk of a lawyer’s day — when we aren’t arguing cases or talking clients out of doing really dumb things (“No, you can’t fire that person cause they’re old;” “Yes, they will catch you if you ‘sort of’ break your probation terms”; or being told amazing, ridiculous stories) is taken up with writing pleadings, memos, and letters about what the law means and how it applies. You may think that the law is just what’s in the statute books, but you’d be very very wrong.

A lawyer’s job is about argument. Very specific arguments. You see, America, like all English colonies, is a common law count. What that means is that courts, not legislators, get to interpret exactly what a specific law means. Judges write out what they think laws mean or how a law applies to a certain situation. Most of this intrepretation is enshrined in court opinions, which are oftentimes dry, usually dull, and very rarely well-written. A lawyer’s job is to sort through all this crap to find out what a law means in relation to their cases and clients — and argue it.

5. Not all of us consider ourselves crusaders for justice.

Yes, many bright-eyed, bushy-tailed young people embark on law school with a dream of making the world a better place, but often, after law school, comes the crushing reality of rent and those extra crushing student loan payments. Some of us have to get jobs that simply pay more money. And in those jobs, our job as lawyers is to do what the person who is paying us the money tells us to do.

I can’t tell you how many times I’ve had other attorneys waste my time (and our clients’ money) droning away on the phone trying to convince me theirs is the side of right. It doesn’t matter, I’m being paid to argue the other side. The same goes when clients effusively thank you for finally listening to them and agreeing — most of us wouldn’t be listening if it wasn’t benefiting our paychecks.

Posted inLegal

How To Become An Electrician

Questions to Ask an Electrician Before Hiring

Finding the right electrician can be as much a matter of safety as getting your money’s worth, since electrical problems are among the leading causes of house fires. Electrical work must be done by the book — specifically, the National Electrical Code book — and follow all code requirements of your city’s building department.

Are you licensed?

Electricians are required to be licensed in most states and municipalities, so don’t consider one who isn’t properly licensed. There are two basic levels of licensure: A master electrician has at least two years of professional experience and is licensed for both design and installation of electrical systems. A journeyman is licensed for installation only. In some areas, journeymen must work alongside masters.

Are you insured?

Certainly one of the deal-breaker electrician questions, given the potentially high liability for this work. Electrical contractors should carry at least $500,000 in liability and workers’ compensation insurance.

What kind of work do you do most?

Like many contractors, electricians often specialize in one area or another. As an example, if your project involves finished spaces, look for someone who specializes in remodels as opposed to new construction.

What special training/experience do you have for this kind of work?

This should be one of your electrician questions if your project calls for specific expertise, such as installing voice/data cabling, home automation systems or solar equipment. Even if another contractor handles the specialty stuff, it’s helpful if your electrician has experience working with those systems and protocols.

things to remember when hiring an electrician

Electrical work is tricky and dangerous to figure out on your own. The slightest error can lead to a short circuit or fire, so it’s a good idea to hire an electrician, even if it’s for the smallest of jobs.

Are they able to self-certify their work?

Most electrical work in the home needs to be done in line with legal standards known in the trade as “Part P”, which means it must be inspected and approved either by the Building Standards department of your local authority, or by the tradesman who carries out the work and is able to self-certify their work. In order to self-certify, the electrician must be registered with a competent persons scheme. These include BSI, ELECSA, NAPIT, NICEIC, STROMA, SELECT and TrustMark.

Read previous, relevant reviews

Read through their MyBuilder reviews. Being positively reviewed is not enough in and of itself—you need to check if they are relevant to the job you need done. Read through previous reviews to confirm that your potential electrician has been well-reviewed for jobs similar to yours. Check also for reliability and punctuality.

Agree to a quote

Before you hire, make sure you are agreeing to a quote and not a rough estimate. The quote should include details about the job, concrete prices, and a payment schedule that outlines a deposit as well as a payment calendar. The schedule is particularly important, since it is what avoids misunderstandings down the line.

Don’t pick the cheapest option

When considering different quotes from your shortlisted electricians, don’t pick the cheapest one. Read through the quote carefully to ensure that you end up picking the best person for your job. Anything that sounds too good to be true usually is.

Electrical Tool Kit List: What You’ll Need, and What You Won’t

Assembling and maintaining an electrical tool kit with the proper tools and gear is one of your main responsibilities as an electrician. With increasingly diverse electrical components, making sure you have the right tools in your kit is essential.

Many new electricians may feel that they need to buy top of the line tools, but if your tools are sturdy and in good working condition you don’t have to spend a fortune. Most employers will provide a list of hand tools, while some may even provide you with a basic starter kit. In either case, the following list will give any new electrician a good starting point.

What to Carry in a New Electrical Tool Kit is Important!

With the new electrical components, maintenance and repairs these days, making sure you have the right tools in your kit is the essential. The electrician designs, installs and maintains electrical systems. Many first time rookie electricians feel that they need to buy top of the line tools, but as long as your tools are sturdy and in good working condition you don’t have to spend a fortune. It is recommended to start with a basic electrical tool kit set up.

Perfect Electrical Tool Kit For New Electricians

Someone once said “It’s always recommended that you treat your new electrical tool kit like a woman would treat her purse. Always know where it is and treasure its contents even when lending something.” Apprentices, as well as some professionals can leave tools behind, and if they move from location to location, never get their tools back.

This raises the requirements for an electrical tool kit. You must be able to:

Install, test, assemble or maintain electrical equipment, wiring, appliances and fixtures using power and hand tools.

Diagnose malfunctioning machinery, systems and components, find the cause and correct it with hand tools and test equipment.

Be able to correct circuit breaker wires or transformers.

Do inspections of equipment, components and other electrical systems to find hazards and defects in compliance with all codes. Advise management about the safety of their equipment.

Be able to plan layout as well as installation of all electrical wiring, fixtures and equipment based on the job specifications and codes.Train or direct workers to maintain, install or do repairs on equipment, wiring and fixtures.

Follow blueprints or prepare sketches that determine where the wiring and equipment is located to insure safety and building rules are being observed.

Be able to use the variety of tools in their electrical tool kit, such as measuring devices, power construction equipment, and testing equipment.

Install a ground lead and connect motor power cables.

Have business management duties knowledge for preparing reports, maintaining records and equipment supplies.

Know how to repair wiring, equipment and fixtures with power and hand tools.

Work from scaffolds, roofs and ladders to repair, install, or maintain.

Build complete tray runs.

Cut and mount various electrical equipment.

Place piping or tubing inside partitions or walls and place wires or cables in complete circuits between boxes.

Fabricate or construct parts to specifications using hand tools.

Attach small plastic or metal boxes to the wall for home electrical outlets or switches.

Be able to do physically demanding jobs such as trench digging to lay conduit wires as well as lifting and moving heavy objects. Safety on the job is critical and even simple ladder safety needs your attention.

Provide assistance in emergencies by knowing how to operate generators and floodlights.

Maintain an up-to-date electrician’s license or ID card that meets government regulations.

Good Reasons to Study Electrical Engineering Abroad

Quick: imagine a life without electricity. You can’t even begin imagining it, right? And I mean that literally: you can’t start imagining, because you can’t read this article, because you don’t have a functioning computer or smartphone to read it on.

It’s easy to get your first Electrical Engineering job

Graduates of engineering schools start Electrical Engineering careers fairly easily because most employers search for fresh minds with good training. They are glad to get young people they can mould to their own specific needs and turn them into experts. This is also the reason why electrical engineers are the most valued on the job market.

You can work in another country after graduation

Being an electrical engineer means having a lot of job opportunities in countries all around the world. The laws of math and physics are universal, and your gained knowledge doesn’t limit you to only the country you studied in.

Electric power won’t be your only focus

Being an electrical and electronics engineer doesn’t mean you will work your whole life plugging and unplugging electronics, or just designing electronic circuits.

Study at top Engineering schools

The best schools in the world provide top-quality Electrical Engineering degrees. You’ll learn the secrets of the trade from the best international professors, in classes equipped with top-notch technology. This top-level education will help you develop your engineering skills to the next level.

Electrical Safety Tips

Working with electricity can be dangerous. Engineers, electricians, maintenance personnel, and others work with electricity directly, including minor electrical repairs to work on cable harnesses and circuit assemblies. Office workers, retail, hospitality, contractor, restaurant, and other employees work with electricity indirectly and may also be exposed to electrical hazards.

Normal wear on extension cords can loosen or expose wires. Cords that are not 3-wire type, are not designed for hard usage, or that have been modified increase your risk of contacting electric current and receiving an electric shock.

Follow these tips when using devices powered by electricity:

Do not modify electrical cords or use them incorrectly.

Use factory-assembled, UL-Listed cord sets and only 3-wire extension cords.

Use extension cords only for light-duty, temporary use (two weeks maximum). Plan to hard-wire items that will be powered on a long-term basis.

Remove cords from receptacles by pulling on the plugs, not the cords.

Visually inspect all electrical cords before use.

Remove from service any cords that are frayed, cut, missing ground prongs, or have exposed wiring.

Do not run extension cords from one floor level to the next or through doorways where doors can be closed onto cords.

Use only GFCI outlets in wet areas, near sinks or tubs, or where there is a potential for liquids and electric devices to be used.